How to Create a Pro Live Stream Setup (Like Kevin Samuels?) | Complete Walkthrough
Want to Live Stream Like a Pro?
Last Updated: 07-18-2024
Listen to this Blog Post
Live streaming is a good form of content that connects you with your audience, answer their question in real-time, and share your expertise.
There are two things that can keep your audience invested in your videos
Valuable content
Good video quality
Just like your recorded videos, your live streams need good audio, a reliable camera, and a systematic flow of the show.
In a recent question by a community member, I was asked to do a breakdown analysis of one popular yet controversial Live streamer named Kevin Samuels.

In this post, I'll be doing a complete breakdown to show you how to create every scene and all the tools that he's using to create a professional-looking live stream.
Want to download the exact setup shown in the video used to create a Kevin Samual's live stream? You can get it here.
Tools and Software You’ll Need
To pull off the look he's doing on his shows, it's really only a couple of programs and it's actually very easy to do.
Here's what you're going to need.
Ecamm Live

Ecamm Live is an all-in-one tool not just for live streaming but also for recorded videos.
This is the main piece of gear we'll need to pull off this show and it'll do all the heavy lifting for us and is super easy to use!
Zoom Web Conferencing App (Optional)

Zoom is what Kevin Samuels used to bring on guests to his live show.
However, since he's usually bringing on guests one at a time and not large groups of 20 or 30 people, we can omit this option and use the built-in native feature within Ecamm Live's Interview feature.
Loopback (Optional)

Loopback is a device that connects Zoom App and Ecamm Live so your audience can hear each other and your audience to YouTube can hear your people on Zoom.
Note: If you choose to use Zoom to bring in your guests you will need Loopback.
Loupedeck Live
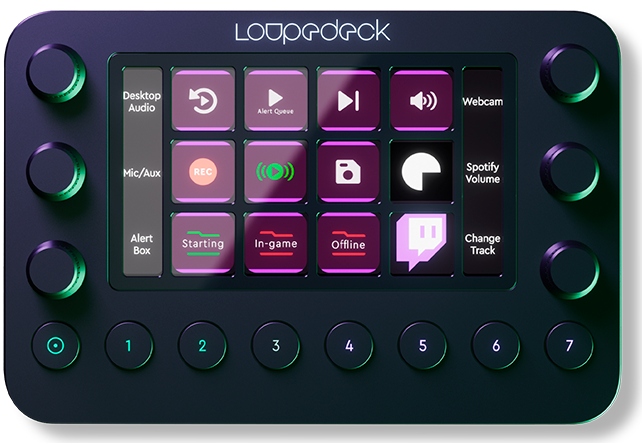
While Kevin Samuels actually uses the Stream Deck by Elgato, but in this walkthrough, I'll be using the Loupedeck Live - which I believe has better functionality and far more creative controls when doing a streaming setup like this.
The 4-Part Streaming Show Structure
When it comes to how we'll build the show out it'll actually break down into 4 main scenes or setups within Ecamm Live.
Scene 1: The Pre-Stream Count Down Timer
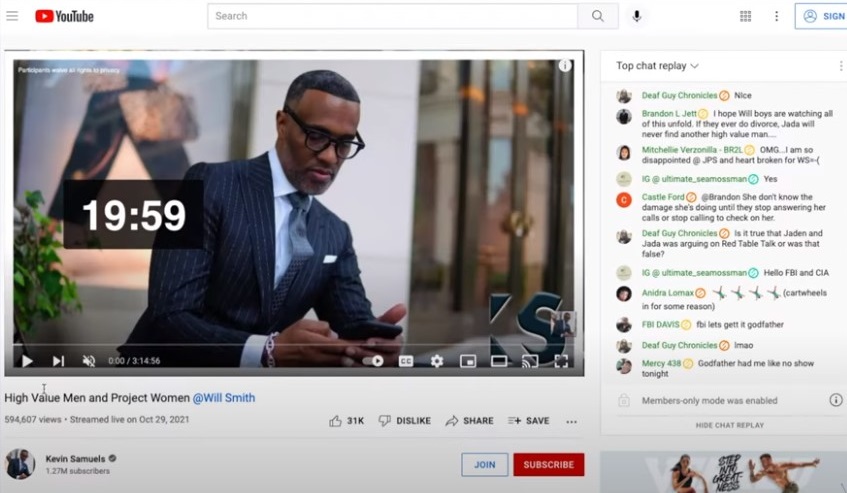
This will be the first scene your audience sees when you first begin your live stream - a simple image and a countdown.
Scene 2: The Main Camera Angle
This is the wide main shot of the camera that will be you on the screen.
If you prefer you can have multiple camera angles that show your side angled shots or it can stay simply just one main camera shot as seen here.
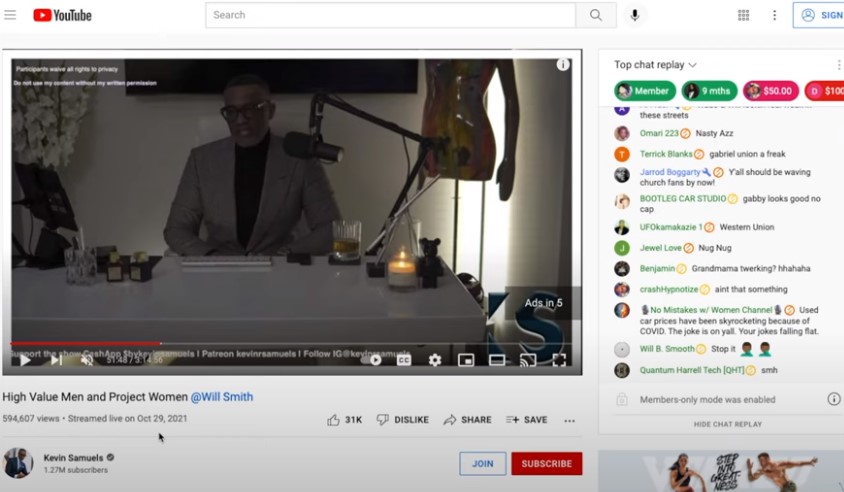
Scene 3: The Live Guest Call-In Scene
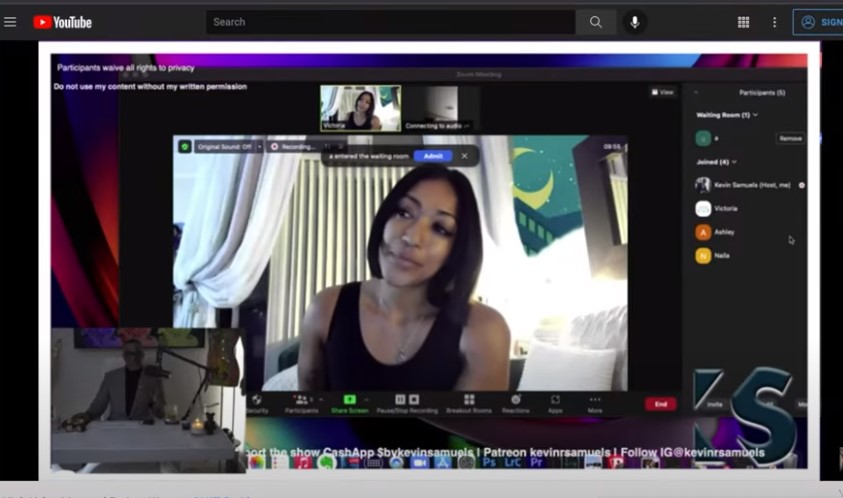
This is where the Zoom App comes in.
Kevin Samuels uses this to bring in his guests one-by-one but you can skip this software tool completely if you use the Ecamm Live Interview feature.
We'll dive more into that later in this walkthrough of your options for bringing on guests.
Scene 4: End of the Live Stream Show Scene
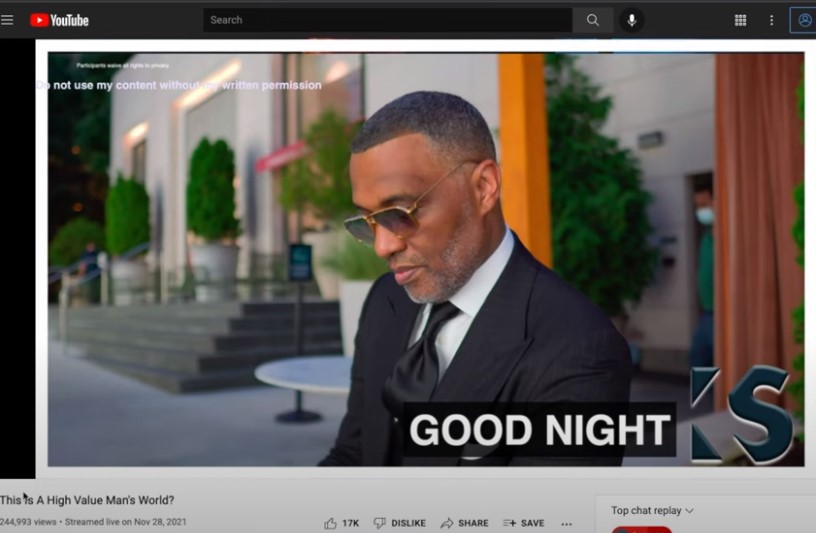
This can be customized to fit your desired next step for your audience.
It can be a "Thanks for Watching" message, a link to the next video your viewers should watch if you're on a social platform like YouTube.
Let's dive into how you'll set up a live stream like this using Ecamm Live.
Part 1: Setting Up Your Live Stream Scenes using Ecamm Live
Let's now create a live stream that operates like his.
Overview of the Ecamm Layout
On the Ecamm dashboard, I have my scenes in my top left corner and my overlays in the bottom left corner.
The Sound Effects panel is located at the middle top, and the Sound Levels are in the top right corner.
Everything else is organized around my main camera window to help efficiently manage the live stream and quickly access settings.
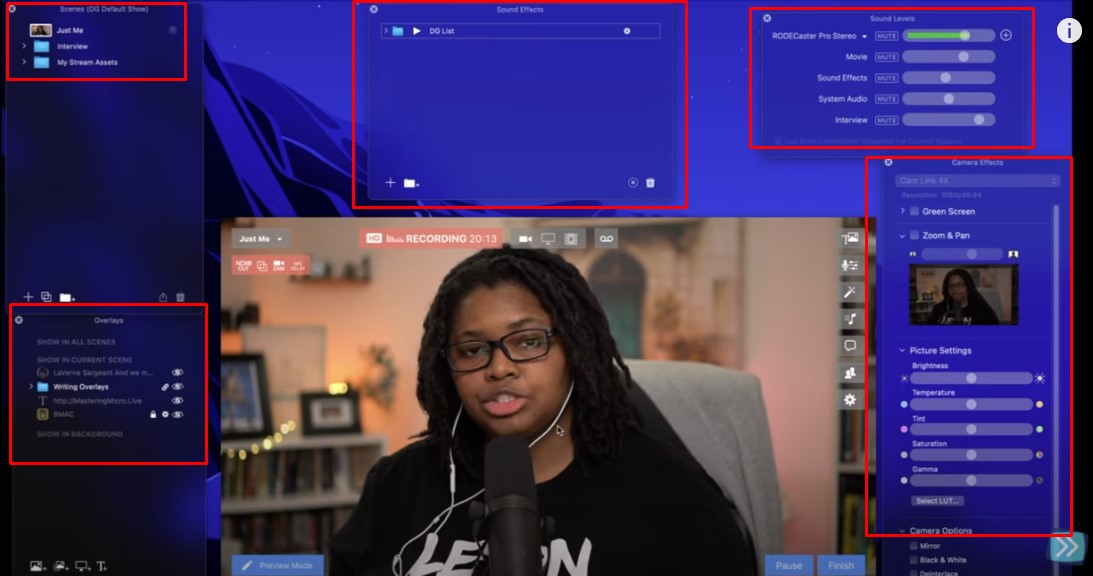
The Ecamm Scenes Panel
Your Scenes are your main folder that will help establish the flow of your live show.
I highly encourage you to organize your scenes and setups. It will help you run your show more efficiently.
How to Create a Scene in Ecamm
Start by creating folders to keep everything organized.
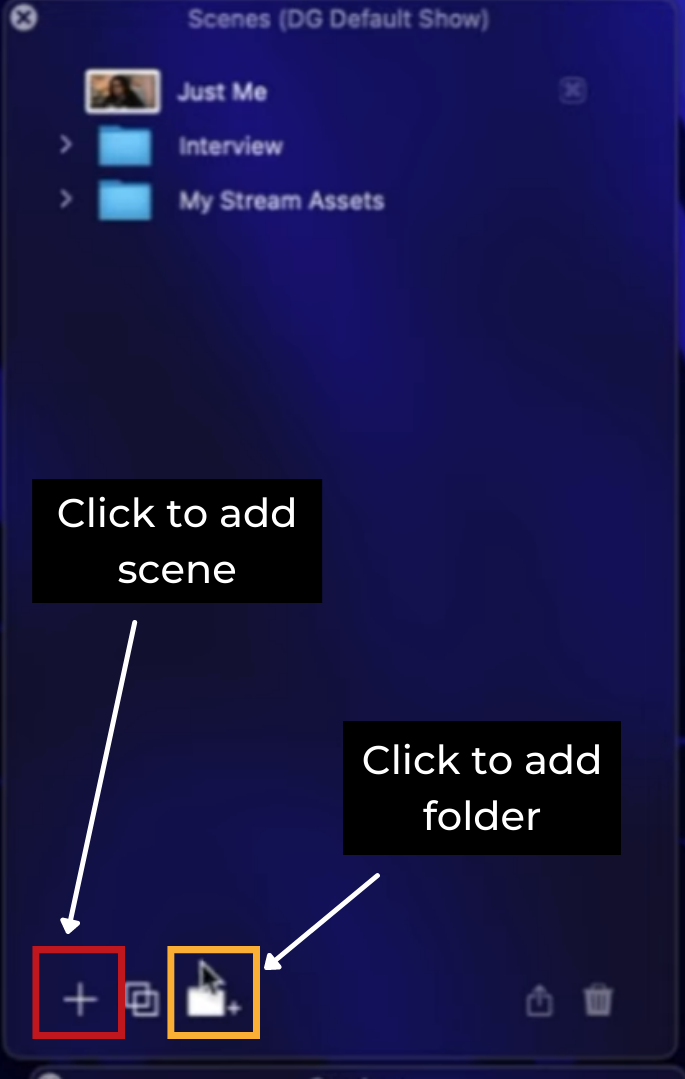
The folder icon with the mini plus (+) symbol lets you add a new folder and the plus (+) symbol lets you add a new scene.
Click the folder icon and rename the folder.
This folder will contain all the scenes for the show.
The “Just Me” Scene / Main Camera Scene
After creating the folder, create a scene.
Hit the plus (+) symbol and rename the scene.
In this example, I will name this scene " Just Me."
This will be my main scene.
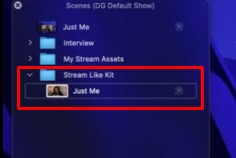
To make the show on brand, I will add my logo.
There are two ways to do this.
Drag and drop an image on your screen
Set up Overlays panel
Setting up your Overlays panel is the organized way to add anything to your screen.
Ecamm Live Overlays Panel
The Overlays have 3 areas:
Show in all Scenes
Show in the current scene
Show in the Background
You can customize your logo to be visible from the beginning of the show up to the end.
How to Use the Ecamm Overlays
To add an image in the Overlays Panel that will appear in every scene, add it to the Show in Current Scene.
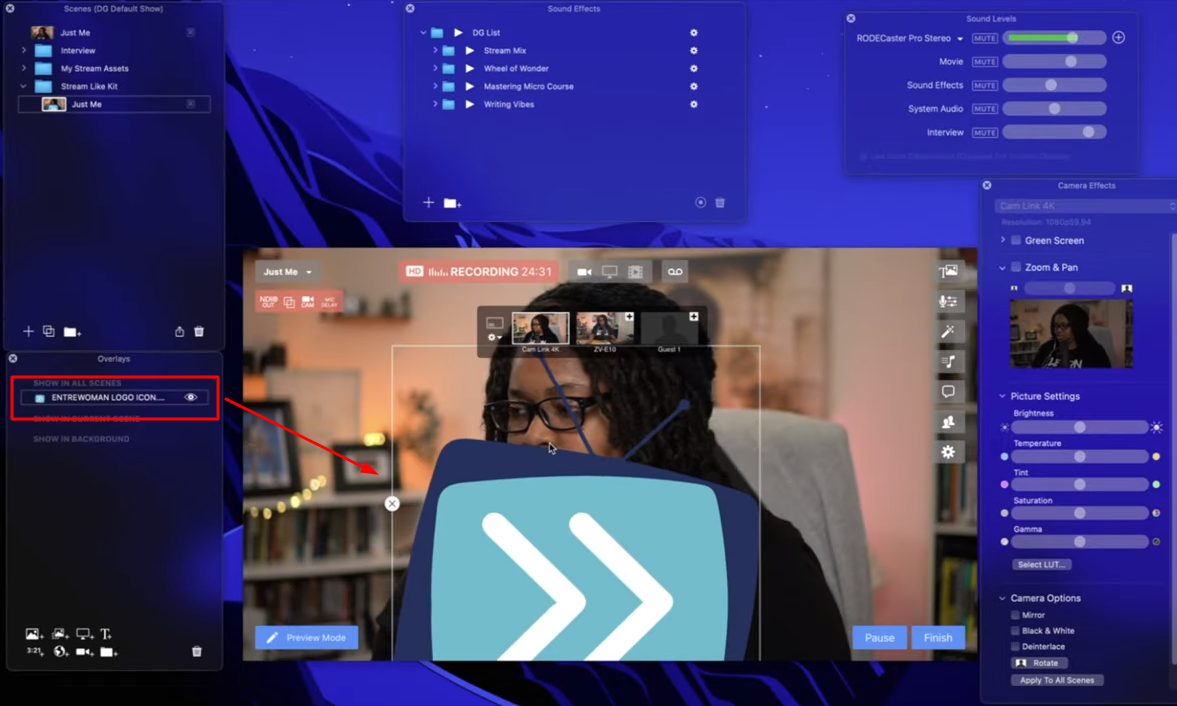
In this example, I will add my logo and place it at the bottom part of the screen.
Drag and drop your image to the Show in Current Scene.
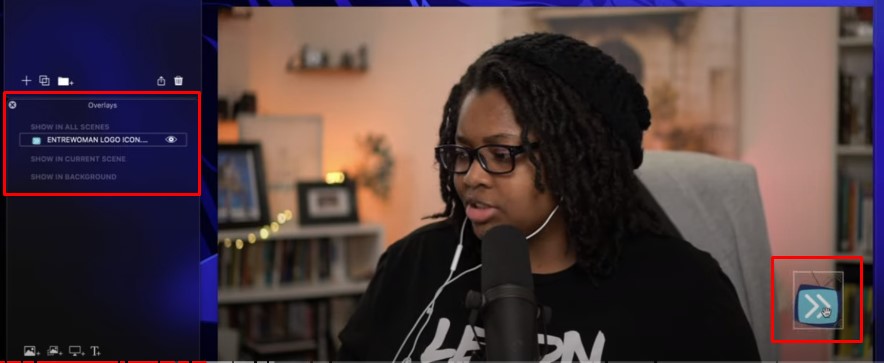
Depending on how you want to position anything in your video, you need to temporarily remove the Ecamm icons from your screen.
If you want to learn how to remove your Ecamm Icons on your screen, you can learn how to do that here.
Pre-Stream Intro Scene
This scene is your "Pre-Stream Intro Scene" or your very first scene.
It will be just an image of you, a countdown timer, and music playing (intro music).
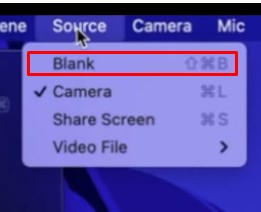
Make sure that you will not show up on this screen while on the Pre-Stream scene.
Go to the Source Setting and choose Blank.
What's next?
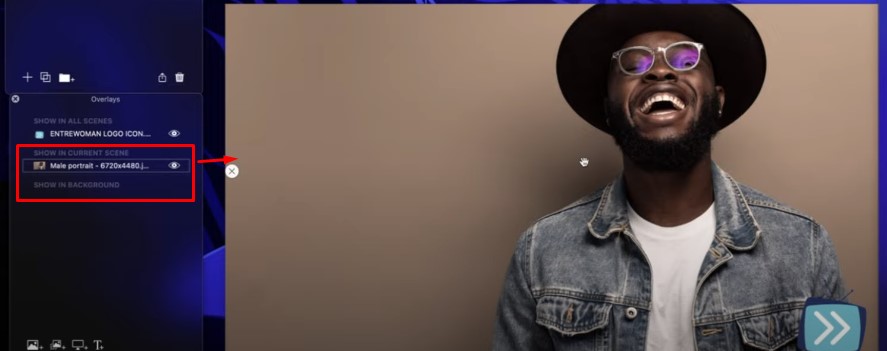
Drag your desired image or video for this scene into the Current Scene Overlays.
Make sure that it will fit the size of the screen. Simply drag it up and down to reframe or resize the image.
⚡️ Pro Tip ⚡️
When adding anything on the Overlays, whether it’s an image of you, your logo, or text, you can lock or make it disappear on the screen.
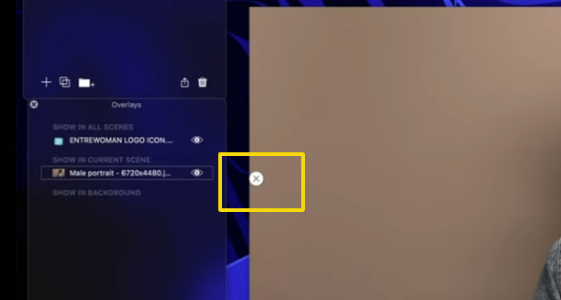
To hide the photo, click the X button on the left side of the image. This action will only hide the image and you can still bring it back.
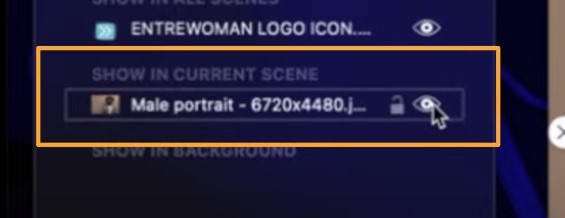
On the right side of the file name of the image that you've added, you can see the lock and eye symbol.
When you click the eye symbol, the hidden photo will reappear.
The lock symbol will keep the image from moving. It will stay in place until the scene / whole show ends.
Lock your main image.
When everything is in place, add the countdown timer.
How To Add Countdown Timer in Ecamm Live
Click the time symbol at the bottom of the Overlays Area.
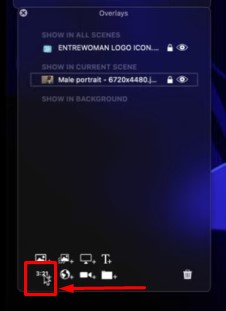
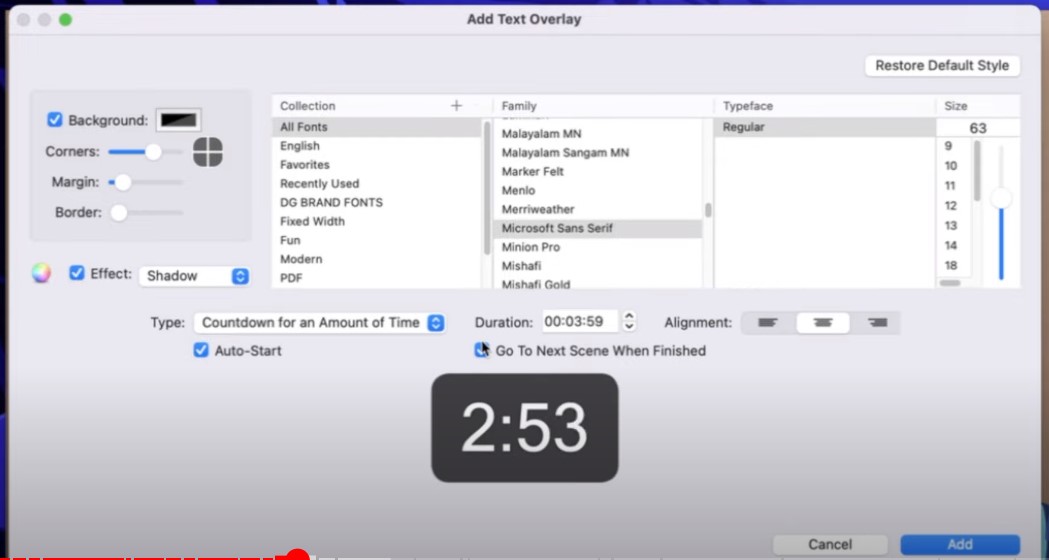
I created a 3 minute and 59 seconds countdown timer and chose to use my branding colors for the background.
To get a translucent effect, use the slider to get the transparency that you want.
Check the Auto-Start and Go to the Next Scene When Finished boxes then click Add.
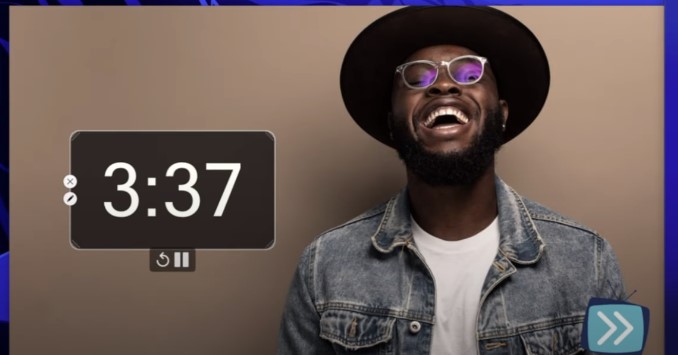
The countdown timer is now added to our main screen.
Next, I adjust the size by dragging the corners or you can also use your mouse scroll wheel.
Lock the countdown timer to lock it in place to prevent your timer from accidentally being moved while your show is live.
Pause the timer while we're building the other scenes for right now. If you don't, you'll constantly rush to complete your changes before the timer moves us along to the next scene in Ecamm Live.
To complete your Pre-Stream Intro Scene, you can add music to your countdown timer.
How to Add Music to Your Live Stream
There are 2 ways to do this.
You can add a video with baked-in music or it can be a separate photo or video and the music directly in Ecamm Live.
How to Add a Video with Baked-In Music
Drag your intro video to the Current Scene Overlay.
A message box will pop up asking if you want to add the animated overlay or add a fullscreen video with audio.
Select the Play Fullscreen with Audio.
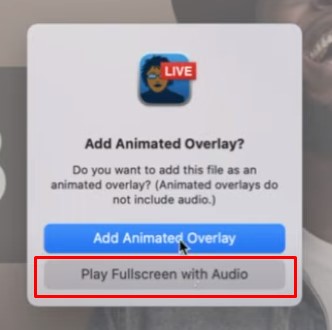
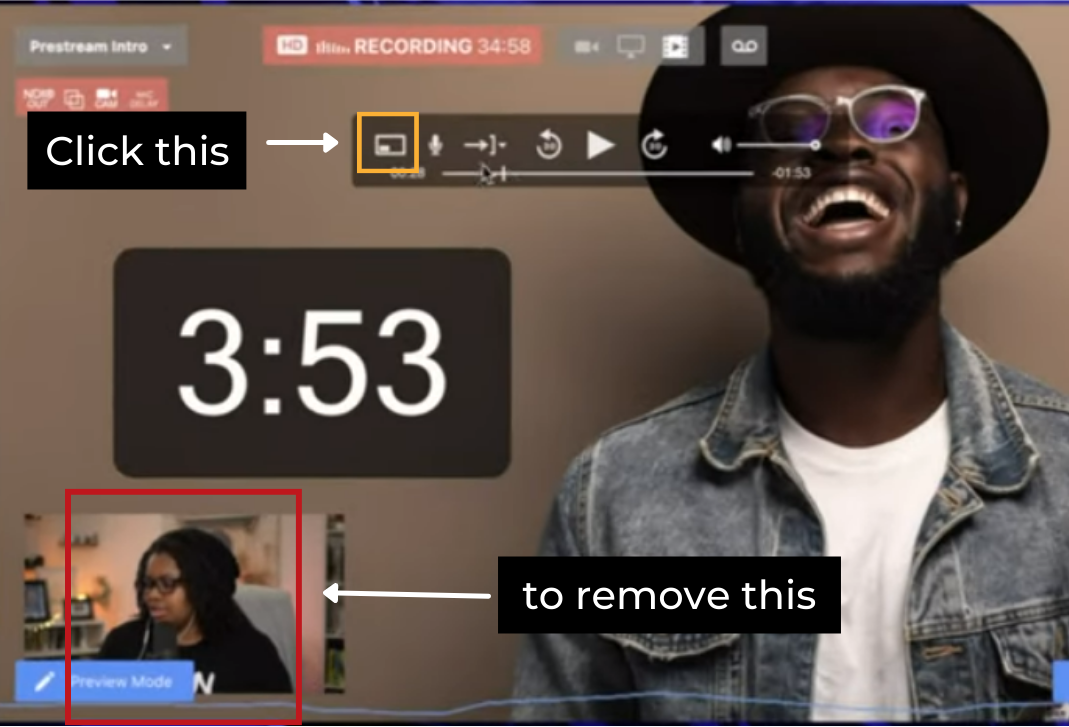
If your camera feed accidentally pops up on the screen upon adding the video, you can hide it by clicking the PIP (Picture in Picture) icon on the Ecamm Live taskbar.
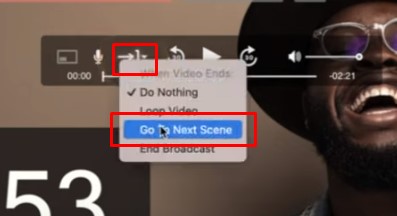
The Arrow icon on the Ecamm taskbar will dictate what will happen when the scene is done.
Click the arrow icon and select Go To Next Scene.
When the scene ends, the next scene will play next.
⚡️ Pro Tip ⚡️
Your music and the timer should be at the same length.
Pause the timer and the music while building the other scenes.
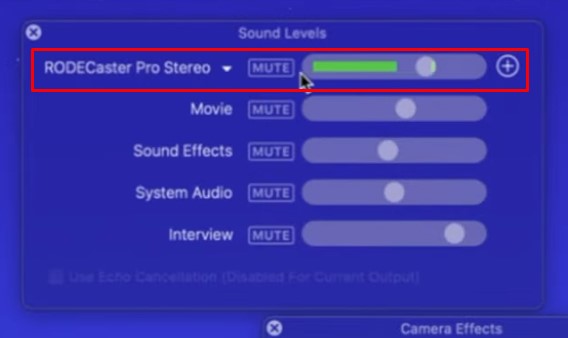
Also, make sure that your audience can't hear you until the main event begins by muting your microphone.
How to Mute Your Microphone
Go to your Sound Levels, locate your microphone and click Mute.
How to Add Music with a Separate Image in the Intro Scene
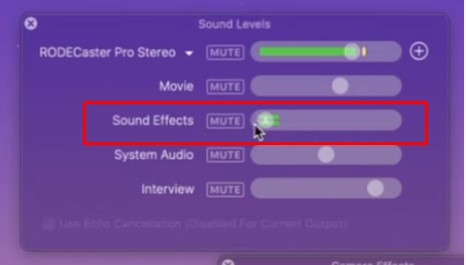
To add the music, take the music and bring this to the sound effects area.
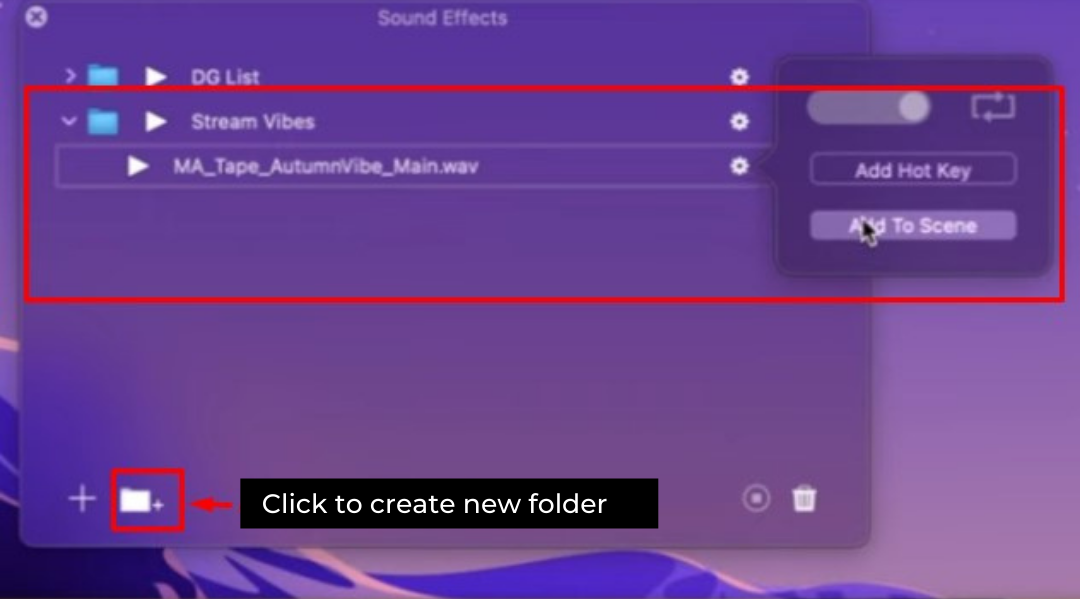
First, create a folder in the Sound Effects Area. This is where you will save your music.
Drag and drop the music to the folder that you've created.
In this example, I named the folder Stream Vibes.
Assign the music to the specific scene. Make sure that you've selected the right scene when adding the music.
I added the music to the Intro Scene.
The music will play automatically when you get on the Intro Scene.
Click on the track to adjust the loudness.
⚡️ Pro Tip ⚡️
As you start your live stream, make your background music louder with the countdown timer rolling down. When the just me scene starts, bring down the volume underneath your voice.
Zoom’s Live Guest Call In Scene
Let's move on to the third scene.
Before setting up this scene, connect the Zoom app to Ecamm Live first.
Here, I will use the Loopback software to connect the audio from Ecamm to Zoom and vice versa so Live call-in guests can be heard by viewers.
How to Connect Zoom to Ecamm Using Loopback
Open the Loopback software.
Loopback has 3 different areas:
The Sources
The Output Channels
The Monitor
We only need the sources and output channels.
First, create a Virtual Microphone for Ecamm.
On the bottom left part of Loopback, click Create New Virtual Device and rename it "Ecamm Mic To Use."
This will become the new microphone source you select in Ecamm.
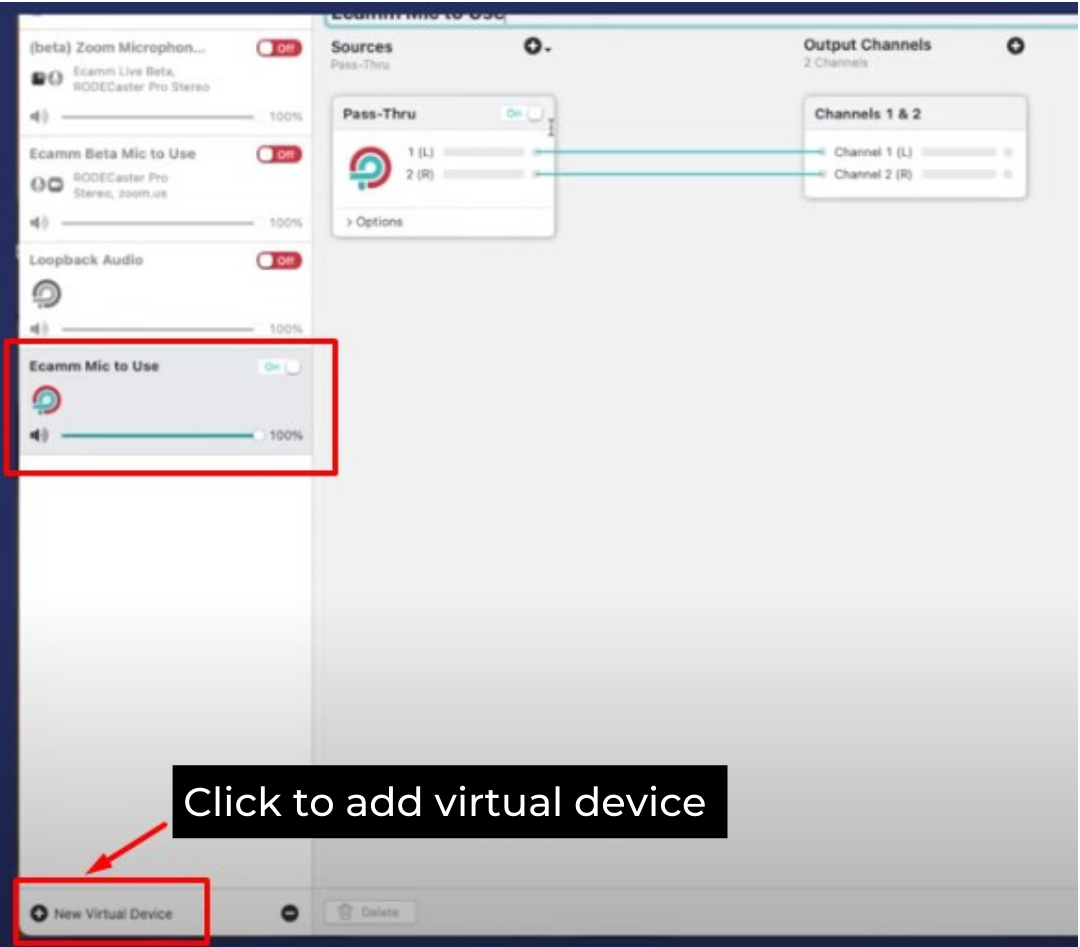
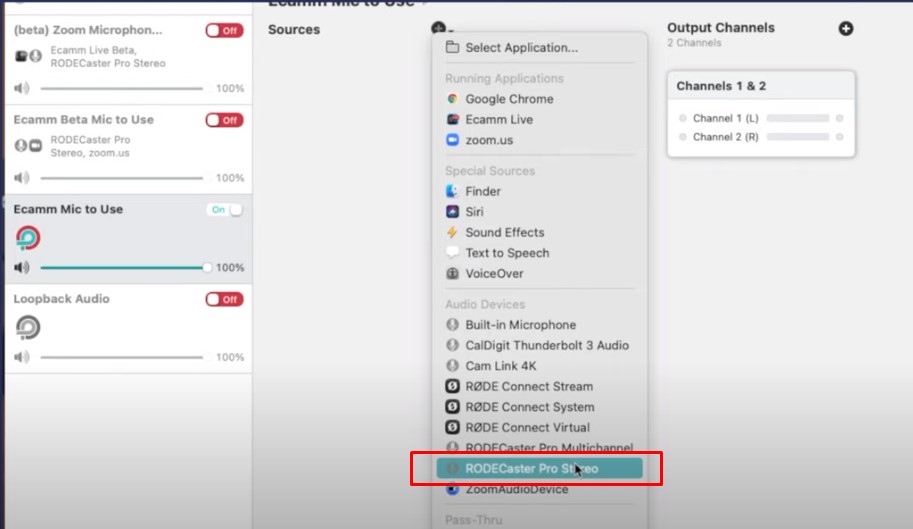
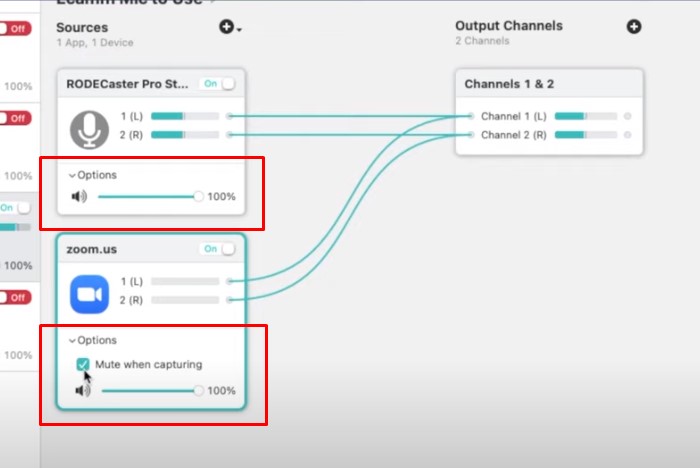
On Sources, delete the Pass-Thru source and add your main microphone.
Click the plus (+) symbol and locate the microphone you're using on the audio devices. I am using the Rodecaster Pro Stereo in this example.
Next, create a connection to the Zoom App.
On the Sources, click the plus (+) symbol again and select Zoom.us
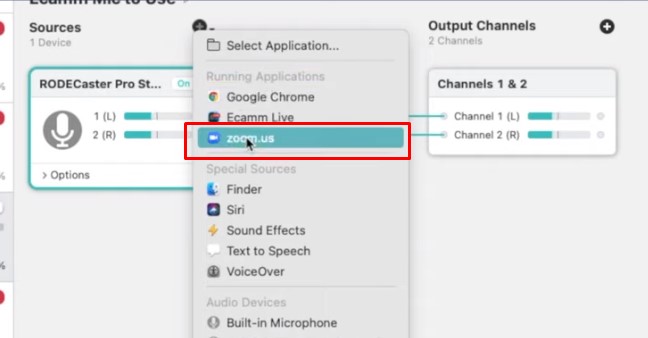
You will also see a successful connection between Zoom and the Output channels with the curve lines that connects the two.
Double-check the Options button for both sources - the microphone and Zoom App.
Make sure that the sound is 100% and the Mute when Capturing box was unchecked.
Next, create a virtual microphone for Zoom App.
When creating a new virtual device and I am naming it "Zoom Mic To Use" to make it easier to identify while live on the stream or when creating new shows or scenes to know exactly what to select and use.
Name things as literal as you can to keep them extremely easy to find. That way, when you're in Zoom, you know what to select for your microphone source when using this setup.
I'm going to use the same as we did when we created the Ecamm Mic to Use.
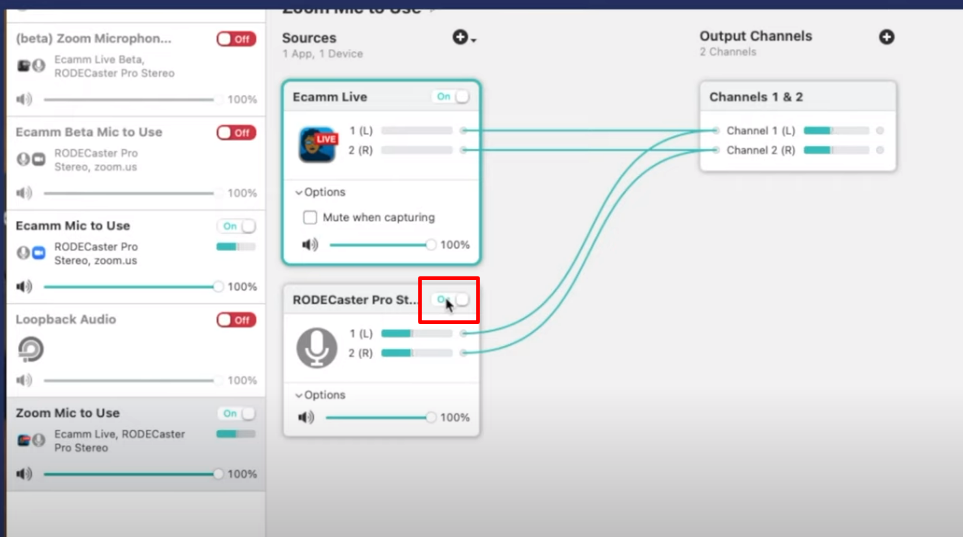
On the Sources, delete the Pass-Thru source and add your microphone and the Ecamm Live App.
You will see the successful connection with the lines connected to the Output Channels.
Uncheck the Mute when Capturing box and make sure that the audio is on 100%.
Also, make sure that the virtual microphones that we've created were ON.
Zoom App Camera and Microphone Setting
Time to set things up with Zoom App.
Sign in to the Zoom application.
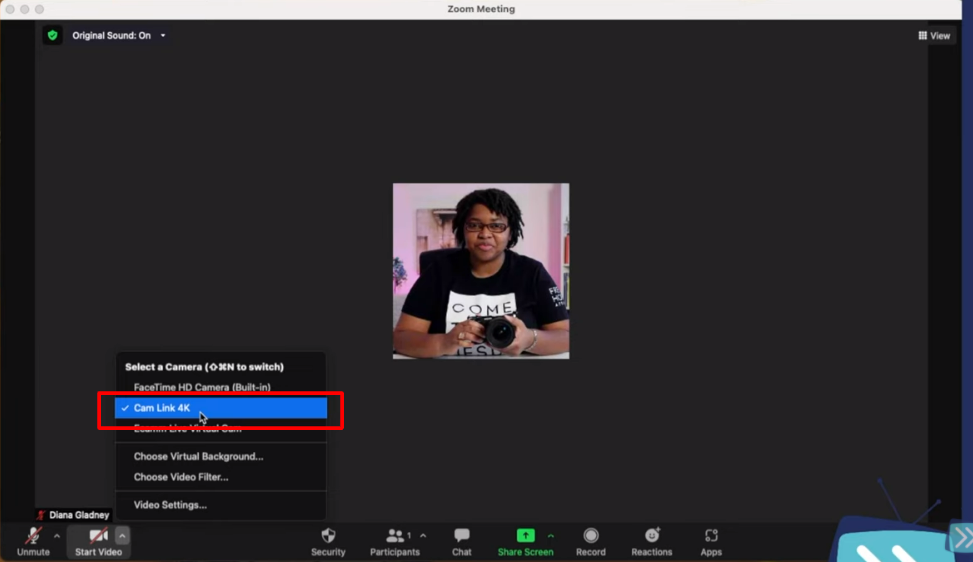
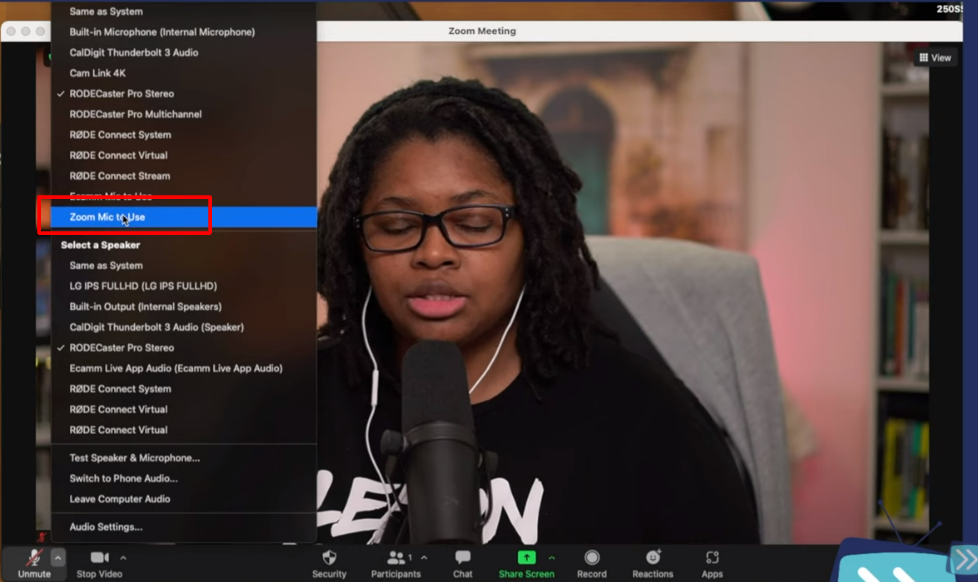
Before you open your camera, make sure that you've selected the right camera which is the Cam Link 4k. For the microphone, use the virtual microphone that was previously set up on Loopback which is the Zoom Mike to Use.
Easier Way to Bring In Guest in Ecamm
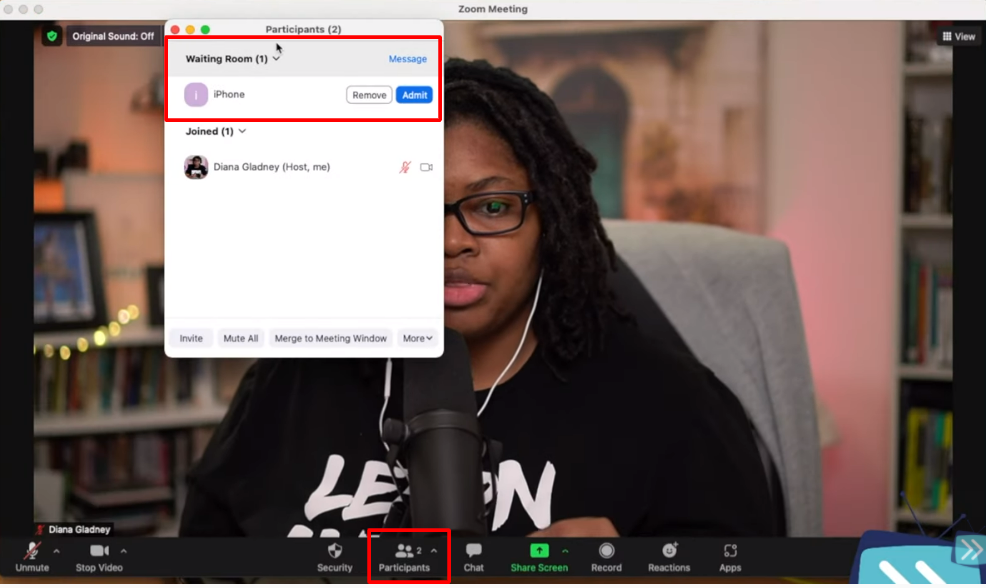
When someone is asking to join your stream through Zoom App, you'll see a little pop on top of your screen. Click Admit to let the people in.

You can also click on Participants to see the people who are already in the room and those who are requesting to join the stream.
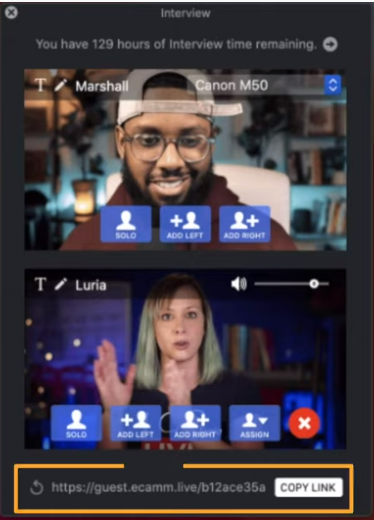
There is also a simpler way to let your people join your stream. Use the interview feature within Ecamm where you can send a branded link to someone who is invited to your stream.
Setting Up the Zoom Room Scene
Go back to Ecamm Live to set up and create the 3rd Scene.
Add a new scene and name it "Zoom Room Scene." Then, click the share screen icon to share your screen.

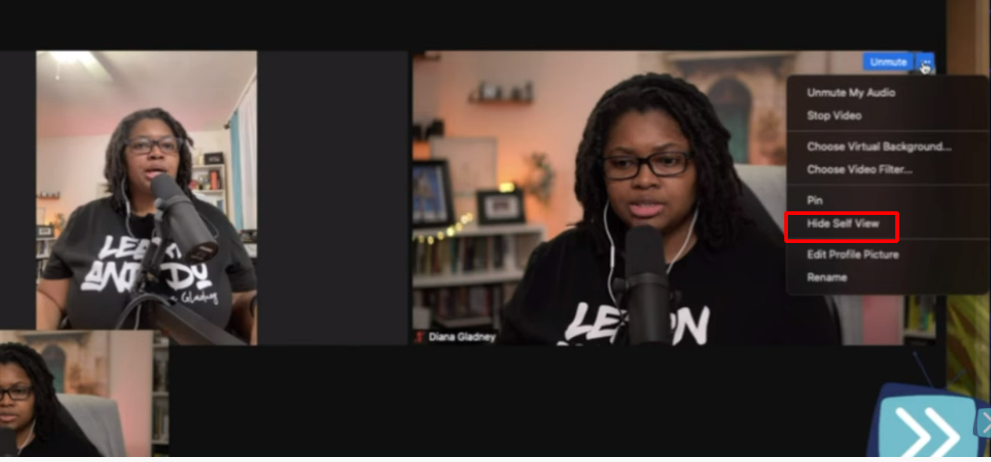
If you are counter seeing yourself on 2 different frames, all you have to do is go to Zoom > Click the 3 Dots > Select Hide Self View.
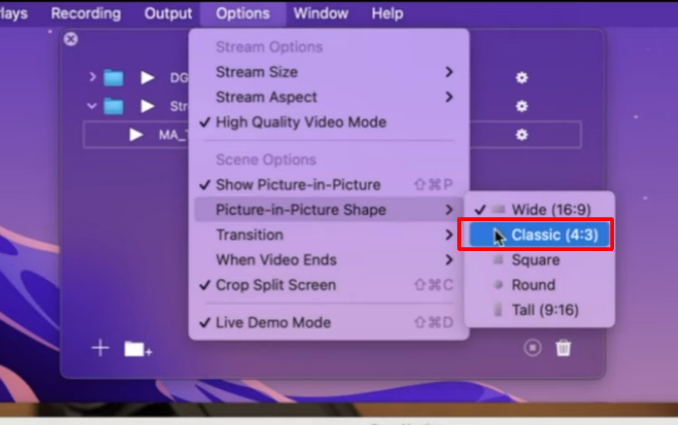
You will notice on Kevin Samuels live streams that his picture-in-picture shape is square.
This shape is a preference and something you can customize within Ecamm Live. As of 2024, the types of shapes and effects you can have within Ecamm Live has drastically increased for the better.
There are tons of customization options to better suit your brand than any other software out there. Plus, it's extremely easy to use and operate, even if you're not a tech person.
To customize the picture-in-picture shape, go to Options > Click Picture-in-Picture Shape > Choose Classic.
End Scene
Just like when we created the Intro Scene, we have 2 options to end the stream:
We can end it with a video file with baked-in music, which automatically ends the stream when the video is over
or, we can do it manually.
We can start the music before the final scene is shown to begin signaling to our audience that the end of the show has been reached and transition the comments to close out the show.
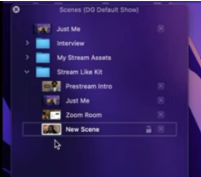
Create the end scene and name it "End of Show Scene."
Make sure to reorder the scenes accordingly.
How to End Scene with Video and Baked-In Music
Make sure that the End Scene is selected.
Drag and drop the video file with baked-in music to Ecamm Live in the Current Scene's Overlay.
Select Fullscreen with Audio.
Make sure you are not showing on the screen as a Picture in Picture image. Remove yourself from the screen by selecting the Picture in Picture icon, like we've done previously.
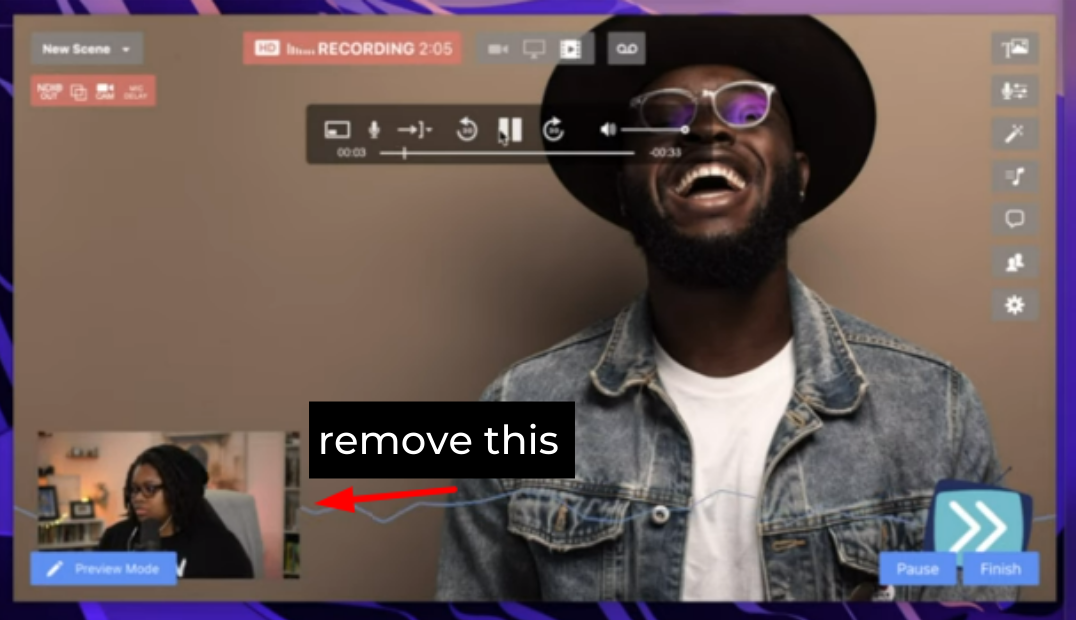
Also, make sure that your microphone is muted in this scene as well.
How to End Scene Manually
If you want a different approach and you want to do it automatically, this is what you are going to do.
For this example, I'm going to create another scene and name it "End Scene / Manual Scene."
Make sure you turn off your camera or remove yourself using Picture in Picture.
Also, be sure you have your image and your logo locked on the screen. This will prevent them from accidentally being moved as you're creating your stream assets.
Add your Thank You message. Click the "T+" icon at the button part of the Overlays.
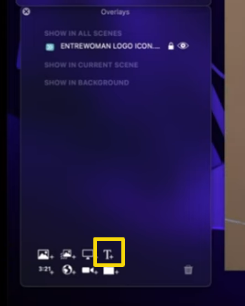
Lock your thank you message to keep it from moving. Seeing a pattern here lol Love the lock button.
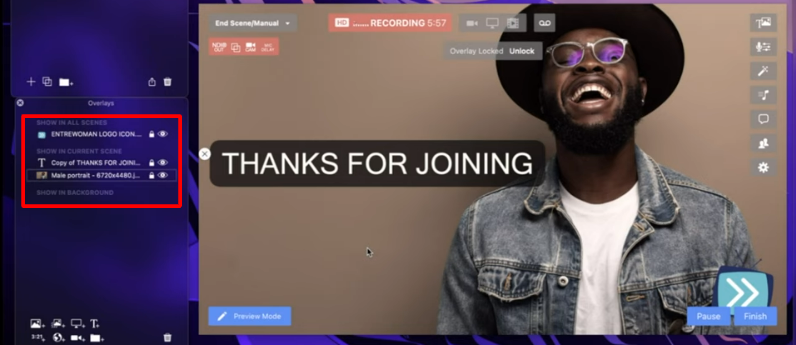
Now, you have all the scenes that you need for your live show.
The last thing to do is link and connect the Ecamm Live app to the Loupedeck Live.
How To Link Buttons on Loupedeck Live to Ecamm Live
Loupedeck Live allows us to customize buttons for specific actions so you don't need to use your mouse to navigate all the actions on your Ecamm dashboard while doing the live stream.
You can integrate different apps to Loupedeck Live. I am using this with Final Cut Pro, Lightroom, Illustrator, Ecamm Live, and more.
To customize your Ecamm Live buttons, go to the Loupedeck applications tab and select Ecamm Live.
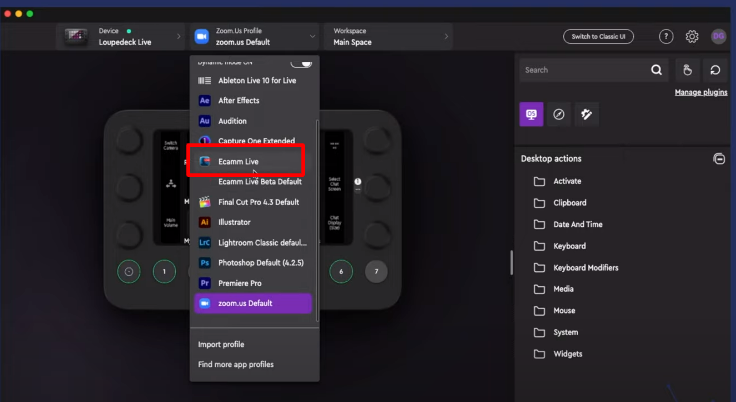
All actions that you have created on Ecamm Live will be linked to the Loupedeck Live App.
Choose a page where you want to add the buttons.
Select an empty button.
Instead of right-clicking on the empty button to add icons (square with + icon), just go over to the Search tab and type in the scenes that you've created on Ecamm.
This is an easy way to search for actions. It will automatically bring out what you have created on Ecamm.
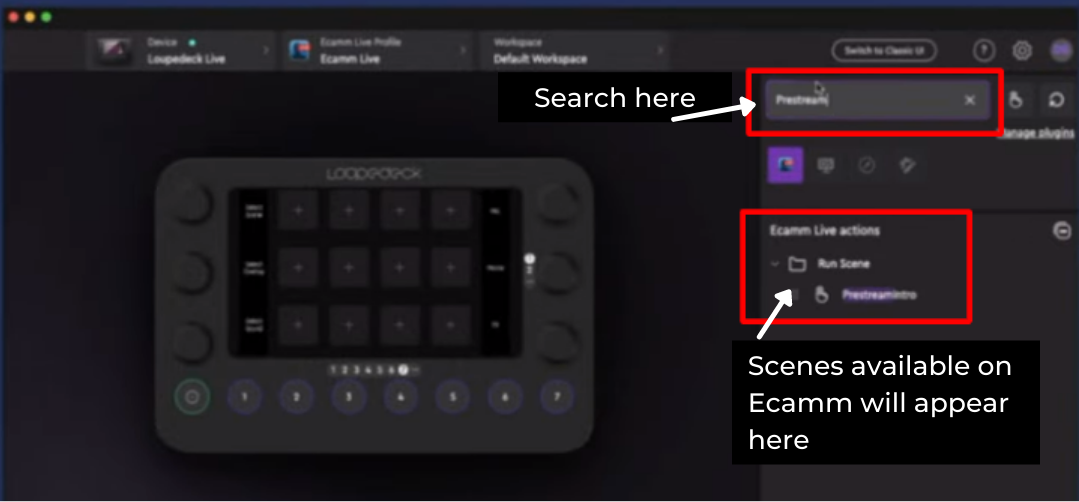
Once you type in Pre-Stream, the Pre-stream scene automatically will populate from Ecamm Live.
Before you assign the button to the scene, update the icon to make sure it's organized and looks more uniformed visually on your Loupedeck Live.
When you're live on your show, you want to quickly glance at your buttons and easily identify what that button's action will do. The last thing you want is to spend a ton of time reading your Loupedeck buttons vs quickly visually identifying them.
It makes a huge difference.
Click the Dots on the Pre-Stream action and a Pre-stream Icon will appear below.
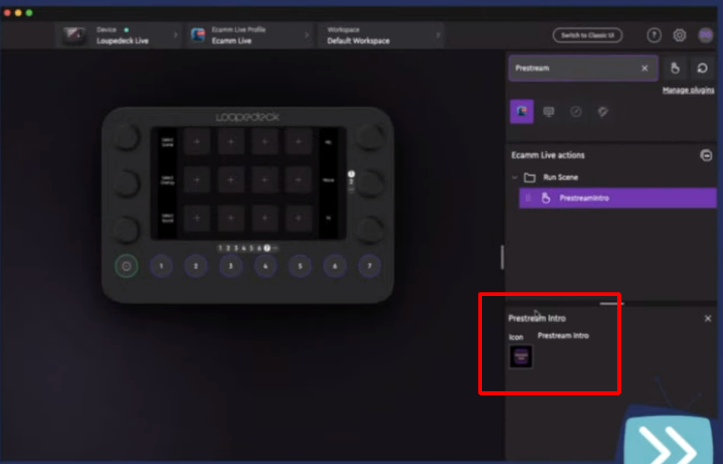
Select the Pre-Stream icon.
You will be directed to the Steam Like Pack where you can see the available icons for each scene.
For the Pre-Stream Intro, select the Stream Start icon.
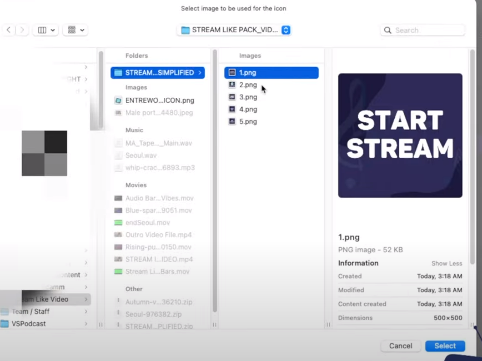
Once you select an icon, an icon Editor will appear.
Make sure that the icon fill fits perfectly. You can resize it using the slider. After that, click Save.
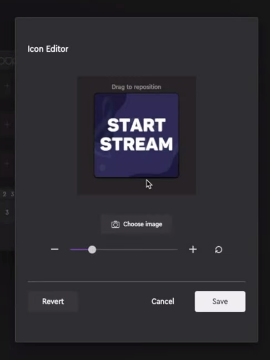
Continue adding the icons for all of the remaining scenes.
After adding all the icons, go back to Ecamm Live and test the customized buttons to make sure they are working as intended for your show.
As you click on the icons you should be changing from one scene to the next.
⚡️ Pro Tip ⚡️
If you rename something in Ecamm Live, like a Scene, you can close and reopen the Loupedeck app to see the update you just made.
How to Create Seamless Actions Inside Ecamm Live using the LoupeDeck Live
Instead of doing everything individually and customizing a lot of buttons on the Loupedeck Live, let's create multiple seamless actions in Ecamm Live using the Loupedeck Live app.
Build a Macro.
Select an empty and available button, Right-Click > Select Macro.
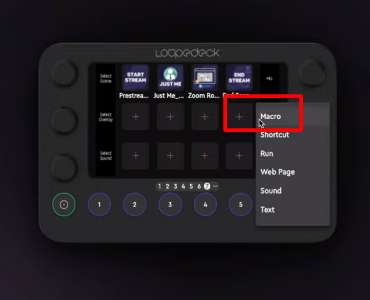
A Create Macro Action box will appear at the bottom right part of the screen that will let you rename the Macro. I've chosen to name it, "End of Show System."
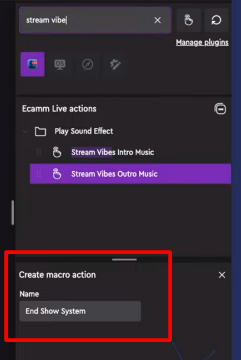
Add the outro music to the End Show System.
Type in the music that you've added on Ecamm on the search bar.
Two music options will appear, the into and the outro music.
Select the outro music and drag it down to the End Show System.
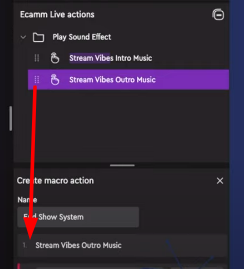
Add some time before the show ends to create a bit of a buffer.
Create an Action.
Click the Add Action Button > Right-Click on the Drop-Down menu, and choose Delay.
I really like adding a simple 30 seconds delay.
Note: The time is in milliseconds.
To break this down, 1,000 milliseconds is equal to 1 second. If you're adding 30 seconds, you should input 30,000 milliseconds into the Loupedeck Live app.
Adding another action that will allow you the time to talk, say goodbye to your viewers, and close out the show after 30 seconds has happened.
Search End Show/ Manual on the search bar or simply type in "End S" and it will show up in the search results. Drag that down to the End Show System Macro.
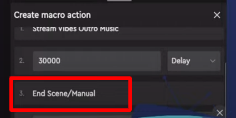
Add a 20 seconds delay.
Click the Add action button > Right-Click on the Drop-Down Menu > Choose Delay and Input 20,000ms for 20 seconds delay.
Add another action to end the stream.
Search Go Live and drag that down to the End Show System. The button on this action will be automatically renamed to Finish.
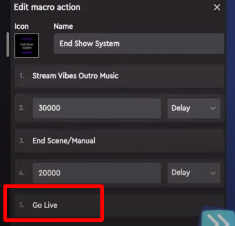
After adding the macros, test everything.
Want to Easily Find High-Res Program Icons for Your Loupedeck Live?
Do you enjoy using the Loupedeck App?
If you want to know more about customizing your buttons, I have created a video that will teach you how to customize your Loupedeck buttons using High-Res Program Icons.
Check out the video I shared on how to do just that!


