Fix 4K Eye Autofocus in Video & Live Streaming on the Sony ZV-E10 (a6600, a6400 & ZV-1)
Fix 4K Eye Autofocus in Video & Live Streaming on the Sony ZV-E10 (a6600, a6400 & Sony ZV-1)
Listen to this Blog Post
Last Updated: 11-08-2024
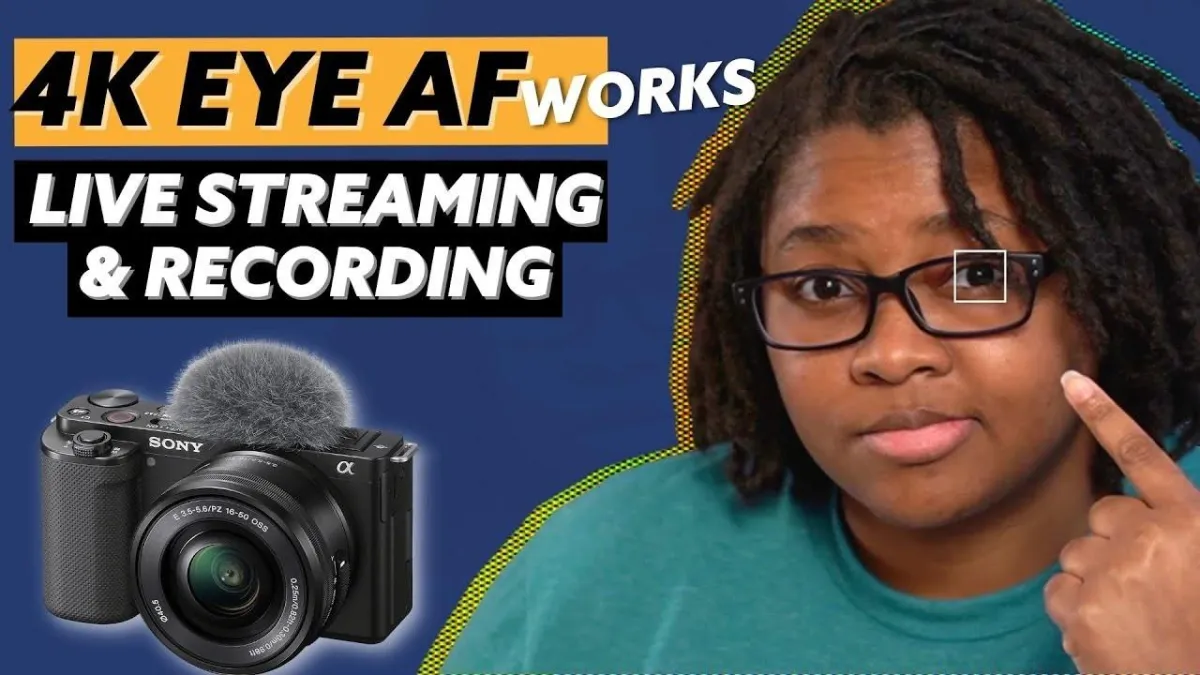
Have you been struggling to get eye autofocus when recording or live streaming in 4K with your Sony ZV-E10? (Including the ZV-1 and Sony a6600 as well.)
One thing about the Sony cameras is that they're like little computers. There's a ton of settings built into these cameras and it can get confusing trying to figure out sometimes very basic functions.
Enabling Eye Autofocus while in 4k is while live streaming and recording videos have been an issue for a minute.
However, that problem is now solved!
Enabling Eye Autofocus in 4k Video Mode
If you're not familiar with the Sony menu systems, there are certain settings that can only be enabled when others are disabled.
AKA You can't enable everything at the same time...sounds weird, I get it.
There's also a video to walk you through step-by-step on how to fix this in your camera to accompany the blog post.
How to Enable 4k Eye Autofocus When Recording
First, make sure your camera is in 4k in Movie Mode.
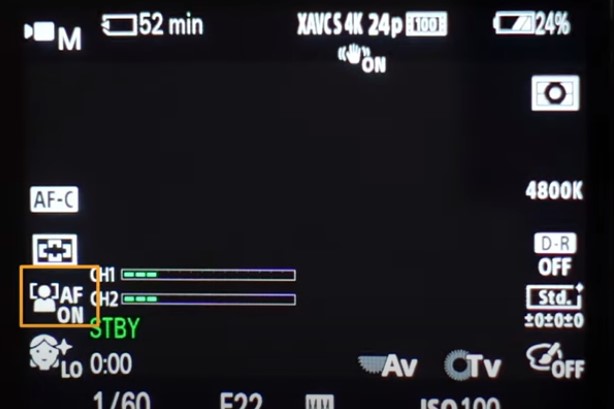
At the bottom left part of the screen, you’ll see that the autofocus box is set to OFF.
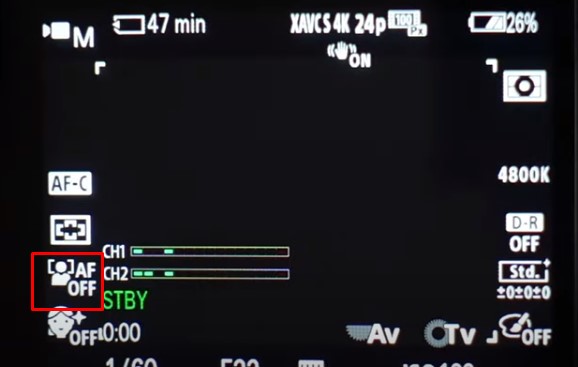
To enable this, press the Menu button and go to Movie 1 Page 1/9.
Go to File Format to select the resolution of 4K listed as XAVC S 4K.
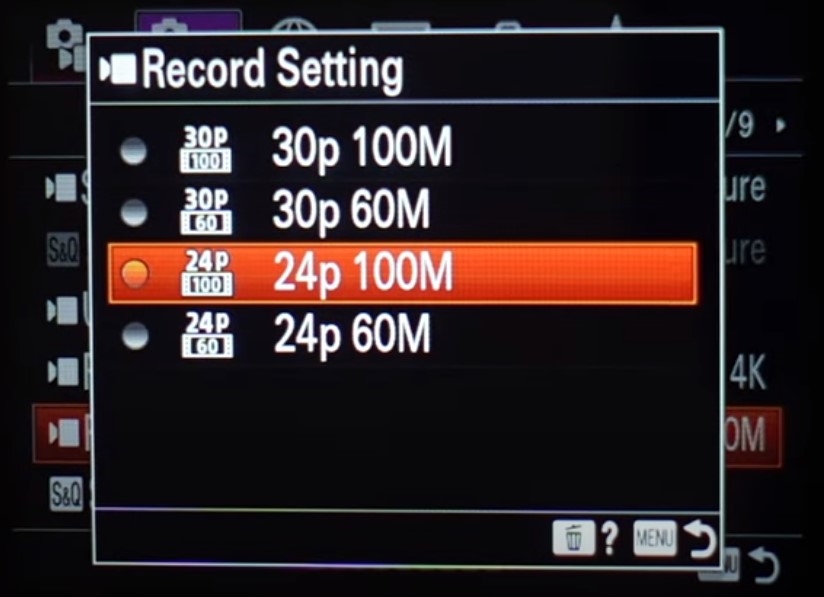
Next, go to Recording Setting and make sure you are recording in 4K video mode and select your preferred frame rate of 24p or 30p. (The higher the bit rate the higher the quality of the video. I prefer 24p 100M.)
Then go to the Movie 2 Page 2/9 and select Proxy Recording and make sure to turn it OFF.
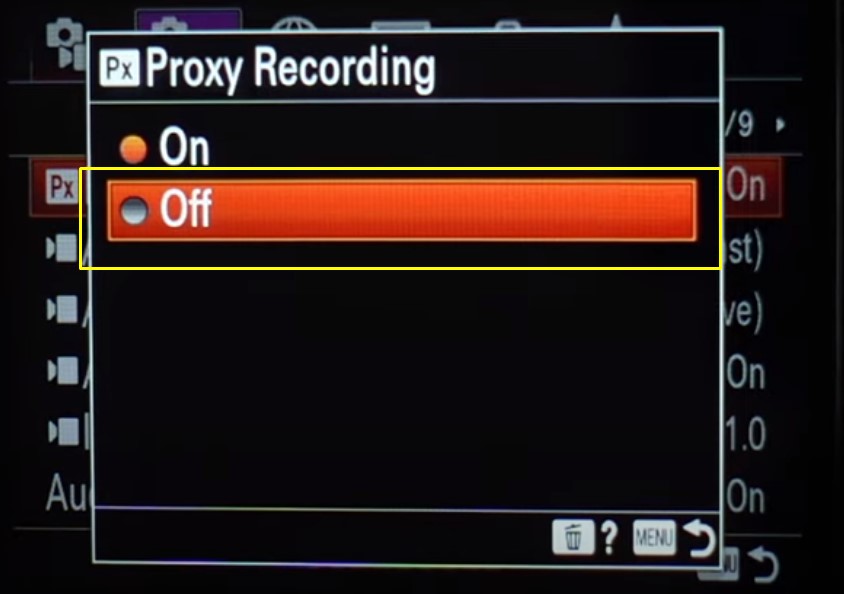
You can gently press the shutter button or the menu button to go back to the live view mode of the camera.
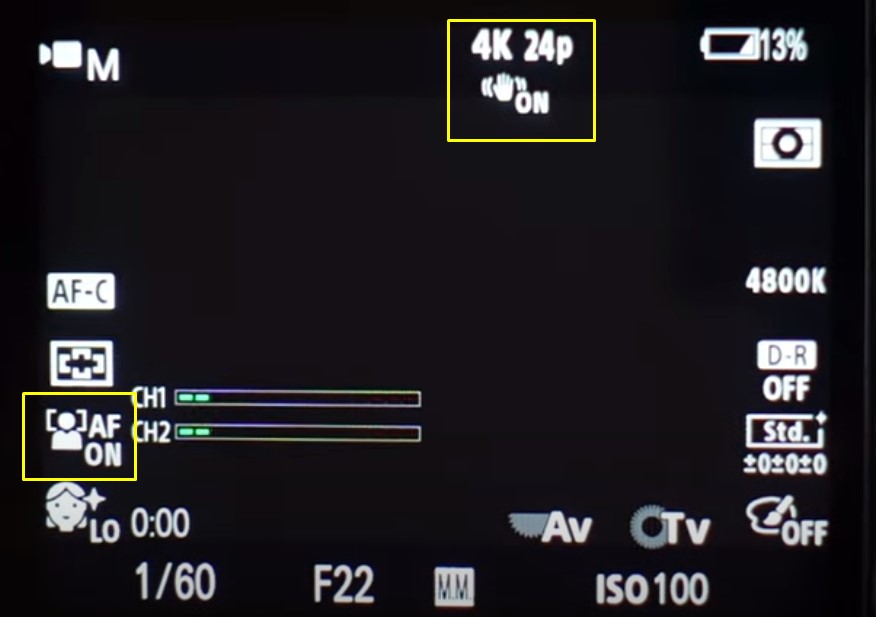
Once you're back to the main screen, you will now see that the autofocus is enabled and set to ON.
How to Enable 4k Eye Autofocus for Live Streaming (via USB or HDMI)
One telltale sign that 4k eye autofocus is disabled when you're connected via HDMI for live streaming, you'll see your autofocus go from enabled to disabled.
You'll also see the autofocus is set to OFF and you have a wide focus framing notified by those little tick marks on the 4 sides of the screen.
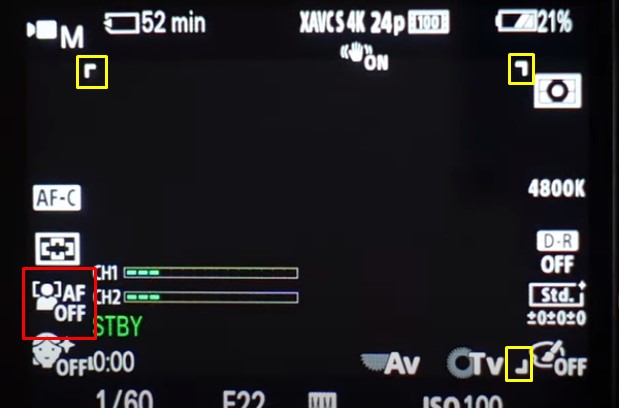
To re-enable the Face and Eye autofocus we need to set the settings before and after connecting the cable.
First, make sure that the cable is not connected.
Select Menu > Network 1 Page 1/2 and select PC Remote Function.
Make sure PC Remote is set to OFF.
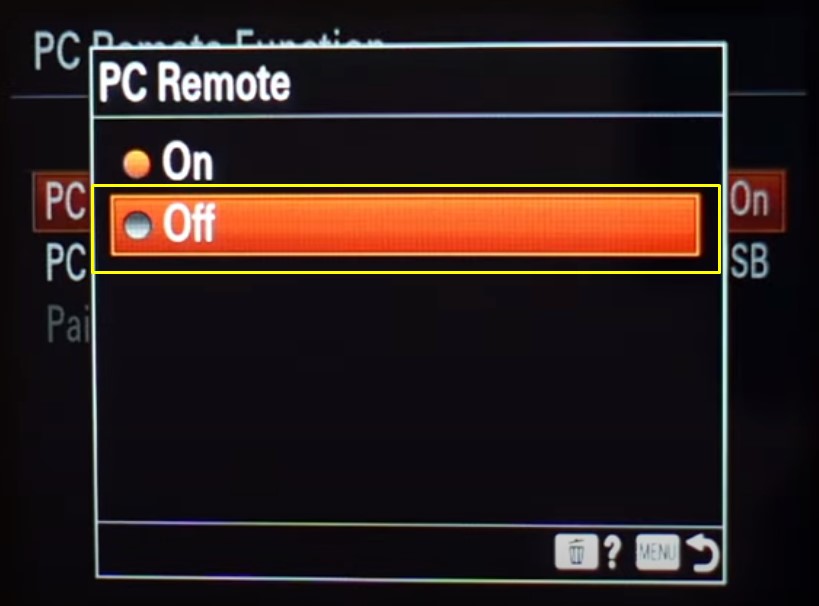
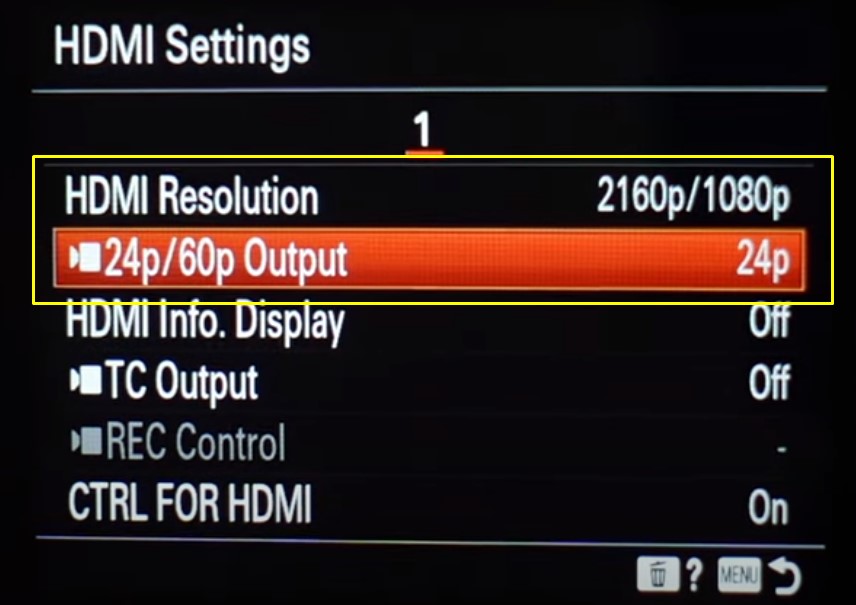
Next, go to the Setup 2 Page 2/5, select HDMI Settings.
Select your desired resolution. I use 2160p/1080p, and 24p/60p Output set to 24p for my set up.
HDMI Info Display should be set to OFF to avoid showing camera icons on the screen.
Now, connect your cable to the camera.
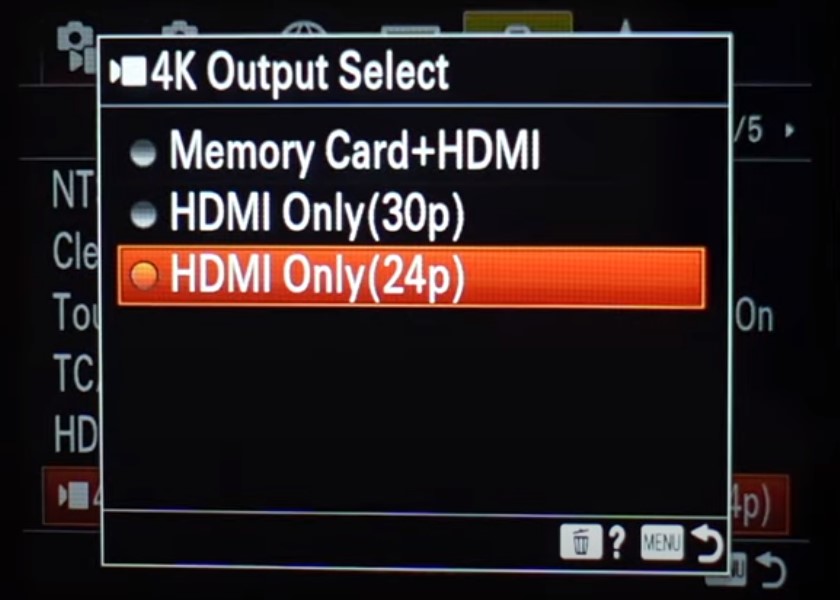
Note: When the cable is not connected, the 4K Output Select is unavailable. When the cable is connected, the HDMI Settings will become unavailable.
Make sure to set the HDMI Settings first before connecting the cable.

Now that the cable is connected and the 4K Output Select setting is available, select a frame rate that will match your HDMI Settings.
In this case, I use HDMI Only (24p) which matches my HDMI and camera settings.
Press the Menu button to return to the live view screen.
You will now see that the autofocus is set to ON and 4k eye autofocus is enabled.
Quick Tips for Streamers & Video Creators
This 4k eye autofocus fix also has been tested and will work the Sony ZV-1, a6400, (re-enabled face detection in 4k), and the Sony a6600 cameras as well.
If you're like me and you create a ton of video content, you may need to re-enable settings like Pro Recording or disable PC Remote Function to re-enable Bluetooth and Smartphone connections.
This is such a hassle. (Sony please change this in the future.)
I've added these settings to the My Menu page for quick access so I can quickly enable or disable certain settings.
Once you're more familiar with your camera you'll be able to easily navigate through various settings to create whatever videos you can imagine.
The Sony eye autofocus is super reliable and a really great feature helping content creators create videos more efficiently not having to wonder if they're in focus on not.


